| Activity | Completed | Uploaded to Blog |
| Emu/Tree Frog morphing | YES | YES |
| Emu/Tree Frog morphing reflection | YES | YES |
| Animal morphing (personal choice) | YES | YES |
| Animal morphing (personal choice) - reflection | YES | YES |
| Emma Watson Glamour Photo and Liquify experiment | AWAY | AWAY |
| Emma Watson reflection | AWAY | AWAY |
| Editing a celebrity (personal choice) | YES | YES |
| Editing a celebrity - Reflection | YES | YES |
| Making your own Brush and reflection | AWAY | AWAY |
| Research 3 emotions | YES | YES |
| Find 3 images to represent each emotion (3 emotions x 3 images) | YES | YES |
| Emotion morphing exercise Create 3 emotions from a selected animal image | YES | YES |
| Photoshop self-experimentation (optional) | YES (ME) | YES |
| Avatar Assessment Task |
|
|
| Planning documentation for your avatar | YES | YES |
| Personality Profile | YES | YES |
| Progress uploads and reflections of your work | YES | YES |
| 2 Completed Avatars | YES | YES |
|
|
|
|
Sunday, March 25, 2012
CHECK LIST :)
Friday, March 23, 2012
FINAL AVATAR 2
step 11 (avatar 2)
step 10 (avatar 2)
step 9 (avatar 2)
step 8 (avatar 2)
step 7 (avatar 2)
step 4 (avatar 2)
step 3 (avatar 2)
step 1 (avatar)
FINAL AVATAR 1
step 12 (avatar)
step 11 (avatar)
step 10 (avatar)
step 9 (avatar)
step 8 (avatar)
step 7 (avatar)
step 6 (avatar)
step 5 (avatar)
step 4 (avatar)
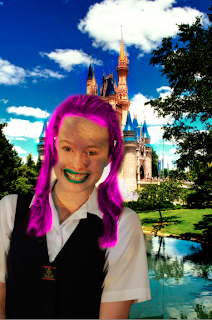
 in this photo i have put christies hair right now it does not look realistic but once i change the look to match her emotion and finish doing the other features the hair will really stand out. next time i would have done my hair out so i have my hair in the photo but i didn't have time to re take the photo :)
step 3 (avatar)
step 2 (avatar)
step 1 (avatar)
ANIMAL MERGE (ELEPHANT,GIRAFFE)
 in todays lesson mr andrews wanted us to have more practise on merging to animals together. i chose a giraffe and an elephant. i would have liked to change the elephants head but i did not have time at the end of the lesson. overall i think this was a great exercise and we learnt a lot of cool tools.
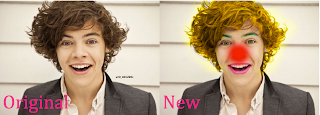
CELEBRITY PHOTOSHOP
 in todays lesson mr andrews gave us a lesson to just have fun with photoshop. i decided to make harry styles a clown becuase i wanted to practise how to change the persons hair colour and eye colour and so on. in this exercise i used masks so there can look more real. i had a great lesson learning how to make people look diffrent by using colours :)
Monday, March 19, 2012
Subscribe to:
Comments (Atom)


 in this image i added a black and white flower skin to my face. i got this image from flickr and i think it really helps the face have more meaning and it gives more emotion.


